
Learning how to replace shock absorbers involves more than removing an old unit and installing a new one. If you misdiagnose a noise, select the wrong application, or miss a final inspection, the original fault may remain. A controlled process helps you avoid repeat labor, unresolved complaints, and unnecessary warranty claims.
To replace shock absorbers correctly, you should first confirm the fault, verify the vehicle-specific parts, follow authoritative service information, support the vehicle safely, inspect related suspension components, and validate the repair afterward. You should never assume that visible leakage or noise alone proves that a shock absorber requires replacement.1
The general workflow is easy to understand, but the critical details vary by vehicle. Suspension design, fasteners, tightening positions, alignment requirements, and electronic functions can all change the procedure. You therefore need to treat replacement as a risk-control process rather than a universal sequence.
How Do You Confirm That Shock Absorbers Need Replacement?
A suspension complaint can tempt you to order parts immediately. However, replacing the shock absorber before identifying the actual source may leave the vehicle with the same noise, vibration, or handling problem. You should begin with evidence, not assumptions.
A shock absorber may require replacement when inspection and testing indicate physical damage, significant fluid leakage, abnormal damping, damaged attachments, corrosion affecting structural integrity, or performance outside the vehicle manufacturer’s limits. You should also inspect mounts, bushings, springs, tires, fasteners, and adjacent suspension parts before reaching a conclusion.
Separate normal surface moisture from significant leakage
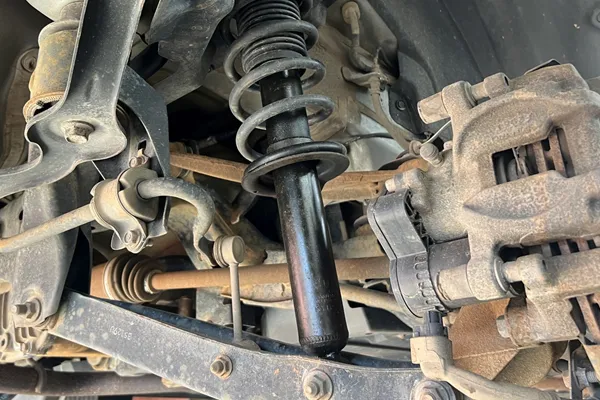
You should not treat every trace of oil on the body as automatic proof of failure. A light film may have a different meaning from fluid that has spread down the body and collected dirt over a wide area.2 The component design and the vehicle manufacturer’s inspection criteria matter.
Before you replace shock absorbers, clean the suspected area where appropriate and inspect it again. You should look for:
- A clear fluid path from the rod seal area
- Wetness extending over a substantial part of the body
- Repeated fluid appearance after cleaning
- Reduced or inconsistent damping performance
- Damage to the piston rod or seal area
- Impact marks, dents, bending, or severe corrosion
You should compare your observations with authoritative service information. You should not create a universal leakage limit because designs and acceptance criteria vary.
Do not assume that every noise comes from the shock absorber
Manufacturer-side return reviews often reveal a useful pattern: the returned shock absorber is blamed because the noise appeared near it, but later inspection points to another source. A loose upper mount, worn bushing, spring contact, stabilizer link, brake component, or incorrectly routed hose can produce a similar complaint.
In my quality-control reviews, I have seen noise complaints where the returned unit did not reproduce the reported fault during bench inspection. The surrounding evidence instead suggested incorrect tightening, damaged mounting hardware, or contact between nearby components. That pattern does not prove that every returned part is good. It shows why you need a complete diagnosis.
Your pre-replacement checks should include:
- A visual inspection: Look for damaged mounts, cracked bushings, broken springs, loose fasteners, tire damage, and signs of component contact.
- A controlled functional assessment: Compare left and right behavior using an approved procedure.
- A road-test confirmation: Reproduce the complaint under controlled conditions when the vehicle is safe to drive.
- A review of related systems: Check steering, brakes, wheel bearings, stabilizer components, and suspension joints where relevant.
- A documented conclusion: Record why replacement is justified and which observations support it.
You should involve a qualified suspension professional when the fault remains uncertain or when the vehicle has electronic, adaptive, hydraulic, or air-suspension functions.
How Do You Verify Fitment Before You Replace Shock Absorbers?
Wrong fitment creates problems before, during, and after installation. A part may look similar but have a different stroke, body length, bracket position, mounting diameter, or damping specification. Once you disassemble the suspension, discovering the mismatch can delay the repair and leave the vehicle unusable.
You should verify the vehicle identification, production date, suspension type, axle position, left or right orientation, original part reference, dimensions, connectors, brackets, and required hardware before disassembly. Catalog data should be checked against reliable vehicle and component information rather than appearance alone.
Build a vehicle-specific fitment record
A model name and year may not identify the correct shock absorbers. One vehicle platform can use several suspension packages.3 Engine weight, body style, drivetrain, wheelbase, payload rating, regional specification, and factory options may affect the application.
You should record at least the following details:
| Fitment item | What you should verify | Risk if overlooked |
|---|---|---|
| Vehicle identity | VIN, model, year, and production date | Wrong generation or production split |
| Suspension design | Separate shock, strut, adaptive, air, or hydraulic system | Incompatible installation procedure |
| Axle and position | Front, rear, left, or right | Incorrect brackets or orientation |
| Key dimensions | Extended length, compressed length, and mounting sizes | Limited travel or installation difficulty |
| Brackets and tabs | Brake hose, sensor wire, and stabilizer attachments | Poor routing or component contact |
| Electrical features | Connectors, sensors, or damping-control functions | Warning lights or loss of system operation |
| Hardware | Nuts, bolts, washers, sleeves, and mounts | Reuse of restricted or damaged hardware |
| Reference numbers | OE and verified cross-reference data | Visually similar but unsuitable part |
You should compare the replacement unit with the removed unit, but that comparison should be a final check rather than your only fitment method. The installed part may itself be incorrect. Two components may also look alike while having different internal valving.4
Confirm whether the part is side-specific
Some shock absorbers and struts are position-specific because they use different mounting brackets, hose tabs, sensor supports, or spring-seat geometry. Installing the wrong side may twist a hose, misroute a wire, change component clearance, or prevent proper assembly.
Return and complaint reviews frequently show how small fitment errors become large warranty disputes. For example, a misplaced bracket may be interpreted as a manufacturing defect even when the ordered application is wrong. You can reduce that risk by photographing labels and mounting details before installation.
You should also inspect the packaging and part markings for:
- Full part number
- Left-hand or right-hand designation
- Production or traceability code
- Included hardware
- Handling damage
- Protective restraints or transport devices
- Installation notices supplied by the component manufacturer
If any application detail remains uncertain, you should stop before disassembly and request confirmation from a reliable technical source.
How Should You Replace Shock Absorbers Safely?
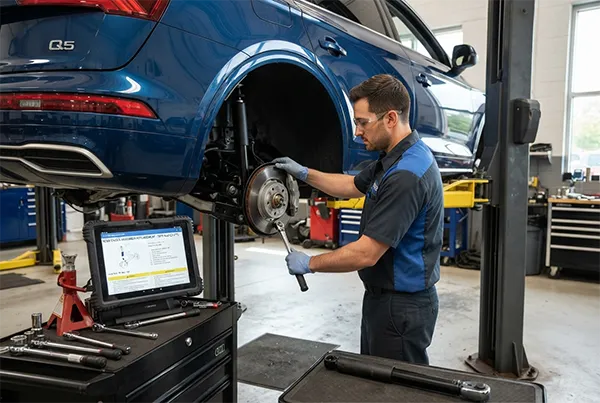
Shock absorber replacement can expose you to vehicle weight, compressed springs, suspended suspension components, and damaged fasteners.5 A generic online sequence cannot account for every design. You need suitable equipment, stable support, and the correct service procedure for the specific vehicle.
You should follow the relevant service manual for lifting points, disassembly order, spring handling, fastener replacement, torque values, tightening position, and system calibration. If the job requires a spring compressor or specialized equipment, only trained personnel should use approved tools in good condition.
Prepare the vehicle and work area
Before you lift the vehicle, you should confirm that the work surface is level and that the lifting equipment has a suitable capacity. You should secure the vehicle according to the equipment manufacturer’s instructions. A jack alone is not a safe support method.6
You should also review the complete procedure before loosening any fastener. This review helps you identify whether the job involves:
- A coil spring under compression
- A complete strut assembly
- Active or adaptive damping connections
- Ride-height sensors
- Air lines or hydraulic pressure
- Brake hoses and wheel-speed sensor wiring
- Single-use bolts or self-locking nuts
- Suspension support during removal
- Required calibration after installation
If you cannot control these hazards, you should refer the work to a qualified repair facility.
Use a controlled general workflow
The exact sequence must come from authoritative service information, but you can organize the work around several general checkpoints:
- Document the original condition. Photograph component orientation, wire routing, hose positions, spacers, and mounting hardware.
- Lift and support the vehicle correctly. Use approved lifting points and suitable support equipment.
- Support the relevant suspension section. Prevent uncontrolled movement when fasteners are removed.
- Disconnect only the items specified by the procedure. Protect brake hoses, sensor wires, and electronic connectors.
- Remove the old component in the correct order. Do not allow the suspension to hang against hoses or wiring.
- Inspect related components. Check mounts, bearings, bump stops, dust covers, bushings, springs, and attachment points.
- Compare the replacement part. Confirm dimensions, brackets, orientation, and supplied hardware.
- Install according to the service procedure. Follow the specified sequence, torque values, and tightening position.
- Restore all routing and connections. Make sure nothing is stretched, twisted, trapped, or rubbing.
- Complete any required calibration or initialization. Follow the vehicle manufacturer’s instructions.
You should never copy a torque specification from a visually similar vehicle. Bolt size alone does not establish the correct value. Fastener material, joint design, coating, thread treatment, and whether the bolt is torque-to-yield can all affect the requirement.
Inspect more than the replacement unit
A new shock absorber cannot correct a worn mount, broken spring, damaged bushing, or loose attachment point. Reusing visibly deteriorated hardware can also create noise that appears after replacement.
You should assess replacement in axle pairs where the vehicle or component manufacturer recommends it. However, you should verify that recommendation for the specific application rather than applying a universal rule. The objective is balanced performance and compliance with approved repair information.
How Do You Validate Shock Absorber Replacement?
The installation is not complete when the wheels return to the floor. A missed fastener, twisted bushing, trapped wire, or unresolved noise may only become apparent under load. If you skip validation, you may hand over a vehicle with the original complaint or a new installation-related problem.
You should perform a static inspection, confirm all connections and fasteners, check ride height and component clearance, and complete a controlled road test when safe. You should then inspect again for leakage, contact marks, abnormal noise, warning lights, or changes in vehicle behavior.
Complete a final static inspection
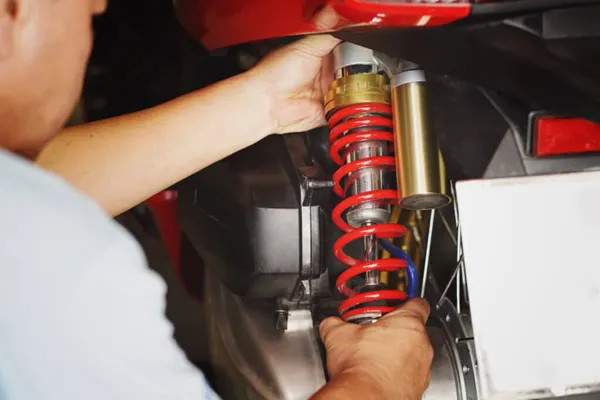
You should verify each disturbed area against the service procedure. A checklist reduces the chance that familiarity or time pressure will hide a small error.
Your inspection should cover:
- Fastener installation and required tightening
- Mount and bushing position
- Spring seating where applicable
- Brake hose and sensor wire routing
- Electrical connector engagement
- Clearance throughout accessible suspension movement
- Dust cover and bump-stop position
- Tire and wheel installation
- Visible fluid leakage
- Left-to-right ride-height differences
- Dashboard warnings or stored faults
Some rubber-bushed joints must be tightened in a specified suspension position to avoid preload. That requirement is vehicle-specific. You should confirm the correct procedure instead of assuming that every mounting point follows the same rule.
Use a controlled road test
A road test should verify the original complaint and identify any new symptoms. You should choose a safe route and follow local rules. You should listen for knocks, rattles, rubbing, or spring movement and observe steering response, braking stability, ride control, and warning indicators.
After the test, you should inspect the installation again. This second look can reveal fresh witness marks, a shifted hose, fluid traces, or a fastener problem that was not obvious before movement.
You should also decide whether wheel alignment inspection is required. Shock absorber replacement does not create one universal alignment rule. The answer depends on suspension geometry, which joints were disturbed, adjustment provisions, and vehicle manufacturer instructions. You should verify the requirement using authoritative service information.
A successful repair should address the confirmed fault, preserve safe suspension movement, and leave documented evidence that the installation was checked.
From a failure-analysis perspective, the post-installation check is often where preventable complaints are caught. A new noise may result from mount orientation, hardware, routing, or an adjacent worn component. Careful validation helps you separate these causes from a possible product defect.
Frequently Asked Questions
Should you replace shock absorbers if they are not leaking?
You may need to replace shock absorbers even when no external leakage is visible. Internal wear, damaged mountings, physical deformation, corrosion, or abnormal damping can justify replacement. You should base the decision on inspection, performance evidence, and vehicle-specific service limits rather than leakage alone.
Does a clunking noise mean that a shock absorber has failed?
A clunk does not automatically prove shock absorber failure. The noise may come from a mount, bushing, spring, stabilizer link, loose fastener, brake component, or another suspension joint. You should reproduce the complaint and inspect related components before replacing any part.
Should you replace shock absorbers in pairs?
Pair replacement may help maintain balanced damping across an axle, and many manufacturers recommend it. However, you should check the vehicle and component manufacturer’s instructions for the application. You should also consider the condition and specification of the shock absorber on the opposite side.
Do you always need wheel alignment after replacing shock absorbers?
You do not always need alignment for every shock absorber design. The requirement depends on the suspension layout, attachment points disturbed, and manufacturer instructions. You should inspect alignment when specified or when you observe uneven tire wear, steering changes, or altered suspension geometry.
Can you replace a strut without a spring compressor?
The answer depends on the assembly design. A conventional serviceable strut may contain a highly compressed coil spring and require an approved compressor. A complete preassembled unit may follow a different procedure. You should use the vehicle service manual and never improvise spring-compression methods.
Conclusion
To replace shock absorbers successfully, you need to control four risks: misdiagnosis, incorrect fitment, unsafe installation, and incomplete validation. You should confirm the fault, inspect related components, verify every application detail, and follow vehicle-specific service information. You should then complete a static check and controlled road test before handover. When the design, torque requirement, spring load, or alignment need is uncertain, arrange a qualified professional evaluation and document the findings before proceeding.
Looking for a direct manufacturer for your suspension line? Partner with GDST Auto Parts for factory-direct shock absorbers, precise fitment data, and stable OEM/ODM services. Contact Our Team Today.
"An On-Board Shock Absorber Detection Method for General ...", https://pmc.ncbi.nlm.nih.gov/articles/PMC13259146/. Technical inspection guidance treats oil leakage and suspension noise as diagnostic indicators that require evaluation alongside damping performance, physical condition, and related suspension components, rather than as conclusive proof of shock-absorber failure. Evidence role: general_support; source type: research. Supports: Inspection guidance or technical research should support distinguishing significant leakage from benign surface oil and evaluating other possible sources of suspension noise.. Scope note: General inspection guidance may not define the acceptance limits applicable to every vehicle or shock-absorber design. ↩
"Vehicle Inspection Test", https://www.pa.gov/content/dam/copapwp-pagov/en/dmv/documents/driver-services/commercial-drivers/pub%20223%20-%20section%2010.pdf. Vehicle inspection criteria commonly distinguish slight dampness or oil misting from substantial leakage, with the latter generally involving visible fluid spread, dripping, or impaired operation. Evidence role: definition; source type: government. Supports: Vehicle-inspection criteria should distinguish minor misting or dampness from leakage severe enough to indicate a defect.. Scope note: Regulatory inspection thresholds vary by jurisdiction and do not replace the vehicle manufacturer's service criteria. ↩
"Design of Three and Four Link Suspensions for Off Road Use", https://arches.union.edu/do/52172/iiif/5dd6f344-804f-48dd-bdd2-25670aa6756b/full/full/0/2017_DavisB.pdf. Vehicle configuration records and service documentation show that a single model line may use different suspension assemblies according to production date, drivetrain, body style, payload specification, market, or optional equipment. Evidence role: general_support; source type: institution. Supports: Vehicle documentation should show that suspension equipment can vary with trim, drivetrain, body configuration, production date, or optional packages within a model line.. Scope note: The relevant configuration variables and production splits are specific to each manufacturer and model. ↩
"Chapter 2 Background", https://vtechworks.lib.vt.edu/server/api/core/bitstreams/3995ad20-1546-4126-97b4-22e5d933d78a/content. Research on hydraulic automotive dampers shows that internal valve geometry and calibration govern force–velocity behavior, so units with similar external dimensions can provide materially different compression and rebound damping. Evidence role: mechanism; source type: paper. Supports: Engineering research should explain that piston and base-valve design determines damping force even when external dimensions are similar.. Scope note: General damper research establishes the mechanism but does not prove that any two particular replacement parts have different calibrations. ↩
"1910.179 - Overhead and gantry cranes.", http://www.osha.gov/laws-regs/regulations/standardnumber/1910/1910.179. Occupational-safety guidance for motor-vehicle repair identifies raised vehicles as crushing hazards and compressed suspension springs as sources of stored mechanical energy capable of causing serious injury if released without suitable equipment and procedures. Evidence role: mechanism; source type: government. Supports: Occupational-safety guidance should document crushing hazards from inadequately supported vehicles and projectile or impact hazards from compressed coil springs.. Scope note: The exact hazards and controls depend on the suspension design and the lifting or spring-compression equipment used. ↩
"Citation 1276530.015/01001 | Occupational Safety and ...", https://www.osha.gov/ords/imis/generalsearch.citation_detail?id=1276530.015&cit_id=01001. Government vehicle-repair safety guidance states that lifting jacks are not intended to serve as the sole support for a raised vehicle and that suitable stands, supports, or an approved lift must secure the vehicle before work is performed. Evidence role: expert_consensus; source type: government. Supports: Safety authorities should state that a jack is a lifting device and that raised vehicles require appropriate secondary support before repair work begins.. ↩