Your car’s lower control arm is one of the important suspension parts, making your car move smoothly and stable. When it wears out, you may experience clunking noises, uneven tire wear, poor handling, and a shaky steering wheel.
Ignoring a damaged control arm can lead to dangerous driving conditions and costly repairs. The good news? You can replace it yourself with the right tools and guidance.
In this guide, we will tell you the entire process – How to Replace Lower Control Arm, from symptoms to do the replacement.
Signs Your Lower Control Arm Needs Replacement
Before you start, confirm that the lower control arm is the actual problem. Here are some common symptoms of a failing control arm:
- Clunking or knocking noises – Especially when driving over bumps or braking.
- Steering instability – If your car feels wobbly or pulls to one side.
- Uneven tire wear – A worn-out control arm can mess up wheel alignment.
- Excessive vibrations – If the suspension isn’t absorbing road shocks properly.
- Loose or unresponsive steering – You may notice a delay when turning the wheel.
If you experience these issues, it’s time to replace your lower control arm.
Tools & Materials You’ll Need
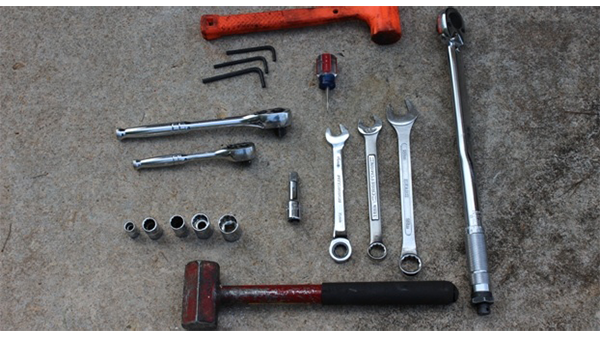
Before starting, gather the necessary tools:
- Jack and Jack stand
- Lug wrench
- Socket and wrench set
- Breaker bar
- Ball joint separator
- Torque wrench
- Pry bar
- New lower control arm
- Thread-locking compound
Now, let’s get into the step-by-step replacement process.
Step-by-Step Guide: How to Replace Lower Control Arm
Step1: Raise and Support the Vehicle
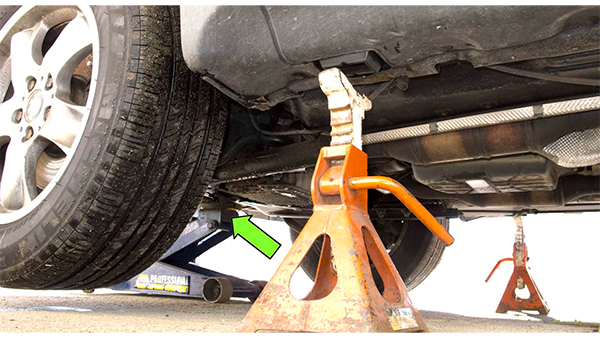
- Park on a flat road and engage the parking brake.
- Loosen the lug nut connecting the control arm to the wheel (do NOT remove them yet).
- Use a jack to lift the car and place jack stands under the frame for safety.
- Remove the wheel completely to access the control arm.
Safety Tip: Never work under a vehicle supported only by a jack—always use jack stands!
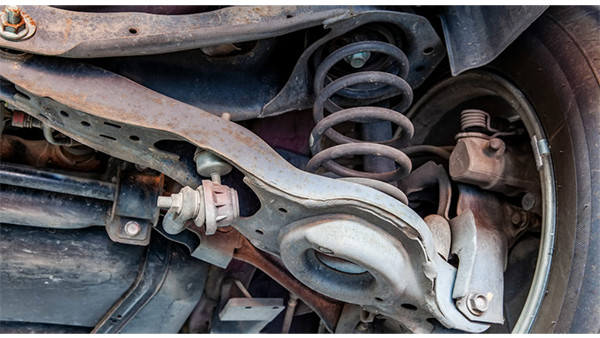
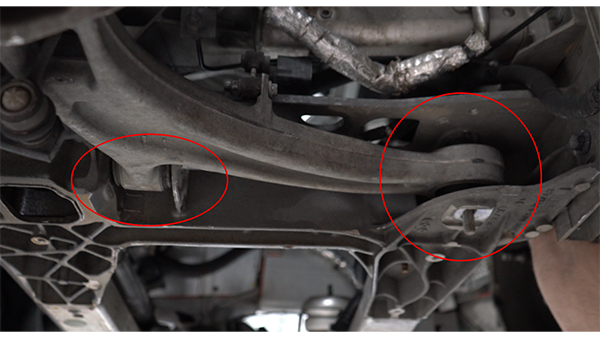
Step2: Locate the Lower Control Arm
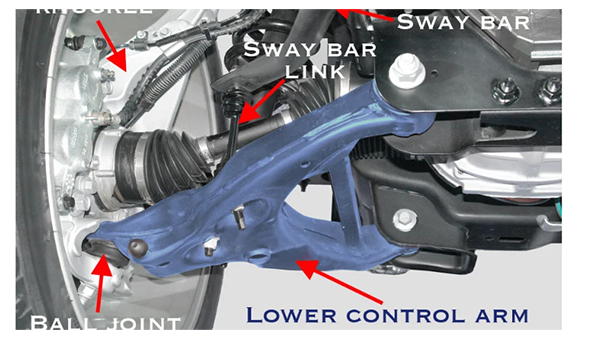
The lower control arm is the piece of metal that connects the wheel to the frame. It attaches to three main parts:
- Frame mounting bolts – Secures the control arm to the chassis.
- Ball joint – Connects the control arm and the steering knuckle.
- Stabilizer bar link – Some cars have a stabilizer link connected to the control arm.
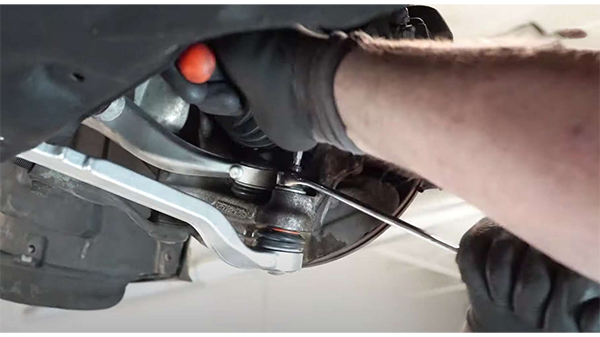
Step3: Remove Connected Components
- Detach the sway bar link (if applicable). Use a wrench to unscrew the nut on it.
- Remove the ball joint from the steering knuckle.
Use a ball joint separator or pry bar to detach it.
If the ball joint is stubborn, apply penetrating oil and tap it lightly with a hammer. - Unbolt any additional suspension components attached to the control arm.
Step4: Unbolt and Remove the Old Control Arm

- Locate the bolts securing the control arm to the frame.
- Use a circuit breaker or impact wrench to loosen and remove it.
- Carefully slide the control arm out—it may require some wiggling or light prying.
Step5: Install the New Lower Control Arm
- Position the new control arm in place.
- Insert and tighten the frame bolts but do NOT fully torque them yet.
- Reattach the ball joint to the steering knuckle.
- If your vehicle has a stabilizer link, reconnect it.
Step6: Torque All Bolts to Specification

Using a torque wrench, tighten all bolts to the manufacturer’s recommended specs. This prevents premature wear and ensures a safe, secure installation.
Torque Specifications:
(Refer to your car’s manual or online guides for exact torque values.)
Step7: Lower the Vehicle and Perform an Alignment
- Reinstall the wheel and tighten the lug nuts in a star pattern.
- Lower the vehicle slowly and remove the jack stands.
- Use a torque wrench to finalize lug nut tightening.
- Get a professional wheel alignment to prevent uneven tire wear.
Success! Your new lower control arm is installed, and your suspension is back in action.
Common Mistakes to Avoid
- Skipping the alignment – This leads to tire wear and poor handling.
- Not torquing bolts to spec – Over-tightening can cause breakage, while loose bolts are dangerous.
- Reinstalling the control arm incorrectly – Make sure the bushings are properly aligned.
- Forgetting to check other suspension parts – Inspect ball joints, bushings, and tie rods for wear.